Live inventory setup
Live inventory is what makes your storefront delivery-aware: shoppers only see and buy what’s actually in the warehouse that serves their delivery address. This is the feature that stops you from overselling.
This page explains how it works for the shopper, then walks through the two one-time setup steps. In the app, this page is called Live inventory — and the app’s own Live inventory screen (shown below) has buttons that take you straight to each setup step.
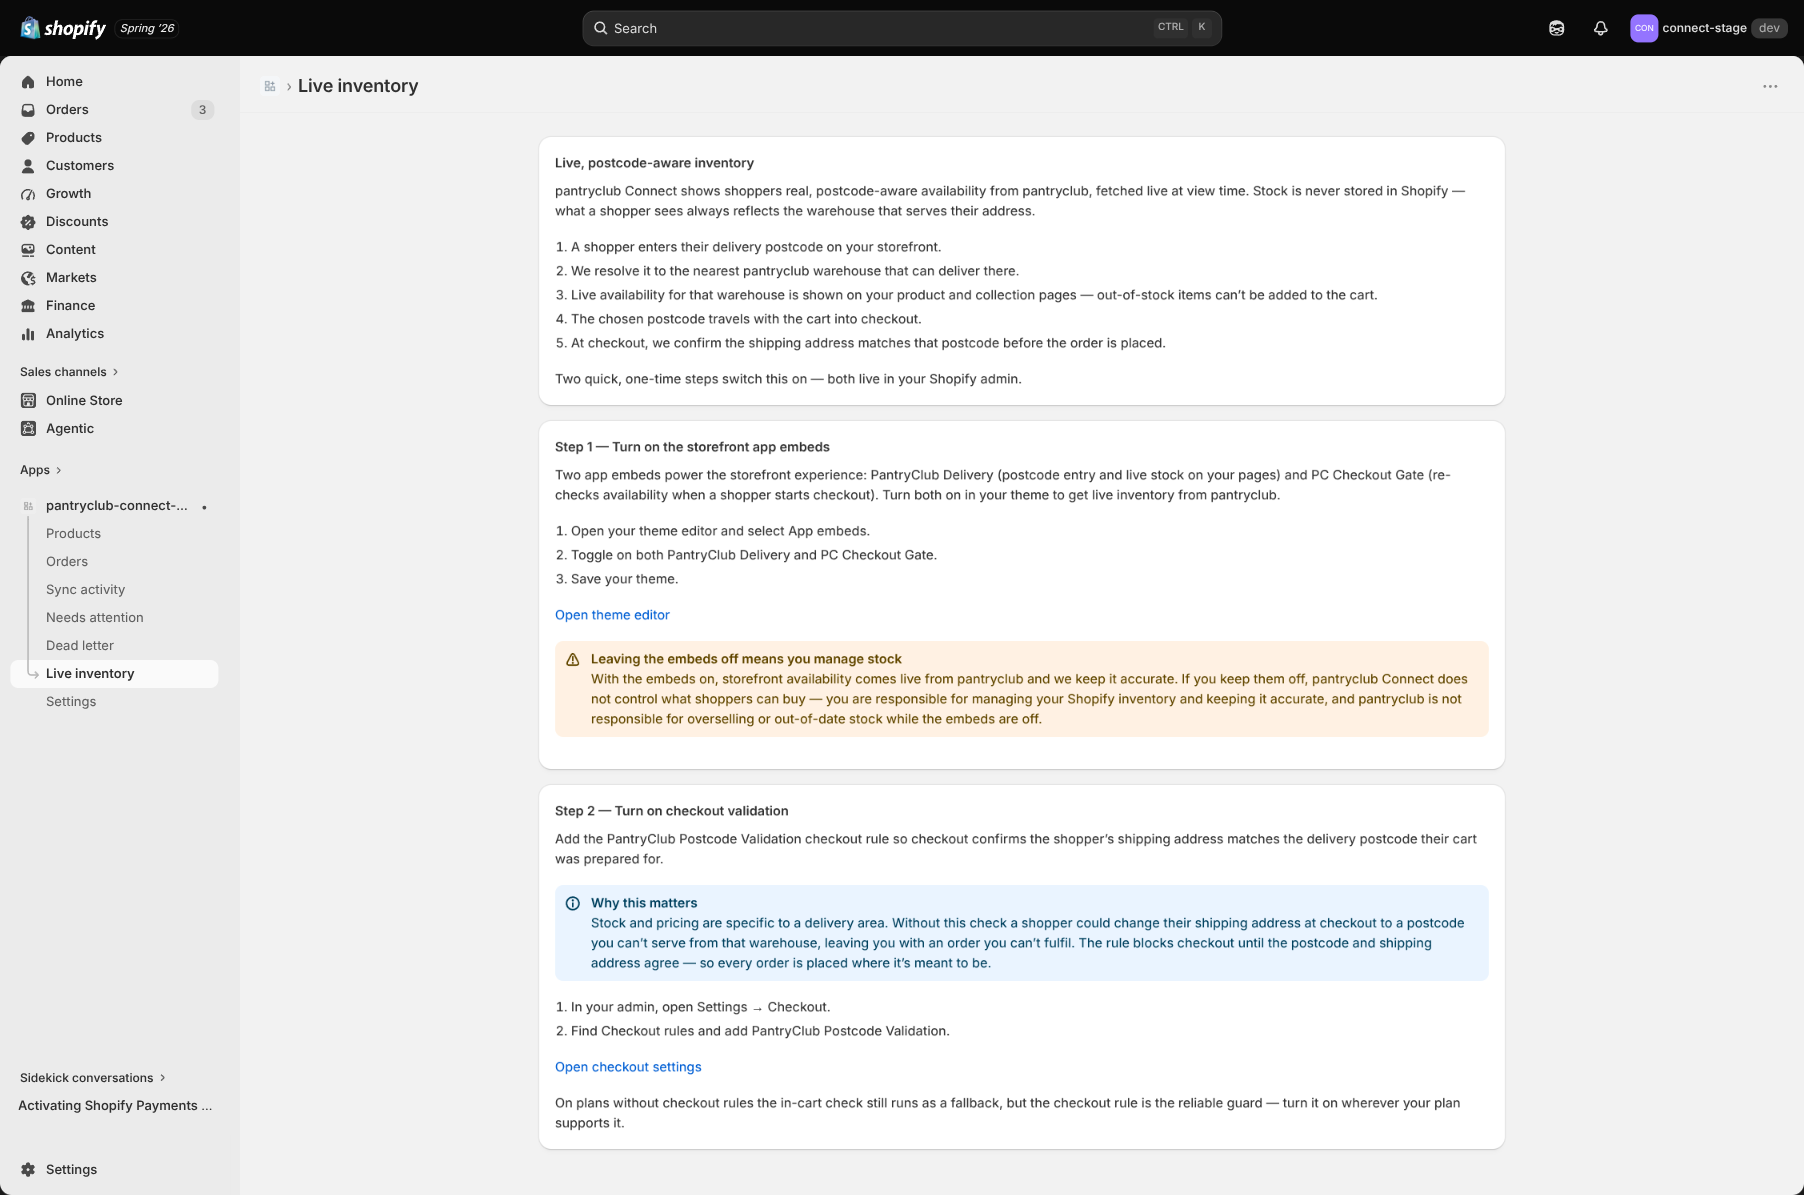
How it works for the shopper
Section titled “How it works for the shopper”- The shopper enters (or shares) their delivery postcode.
- PantryClub works out which warehouse serves that postcode.
- The storefront shows live stock for that warehouse — out-of-stock items can’t be added to the cart.
- The chosen postcode travels with them to checkout.
- At checkout, the app confirms the delivery address still matches the warehouse, so an order can’t slip through for an address that can’t be served.
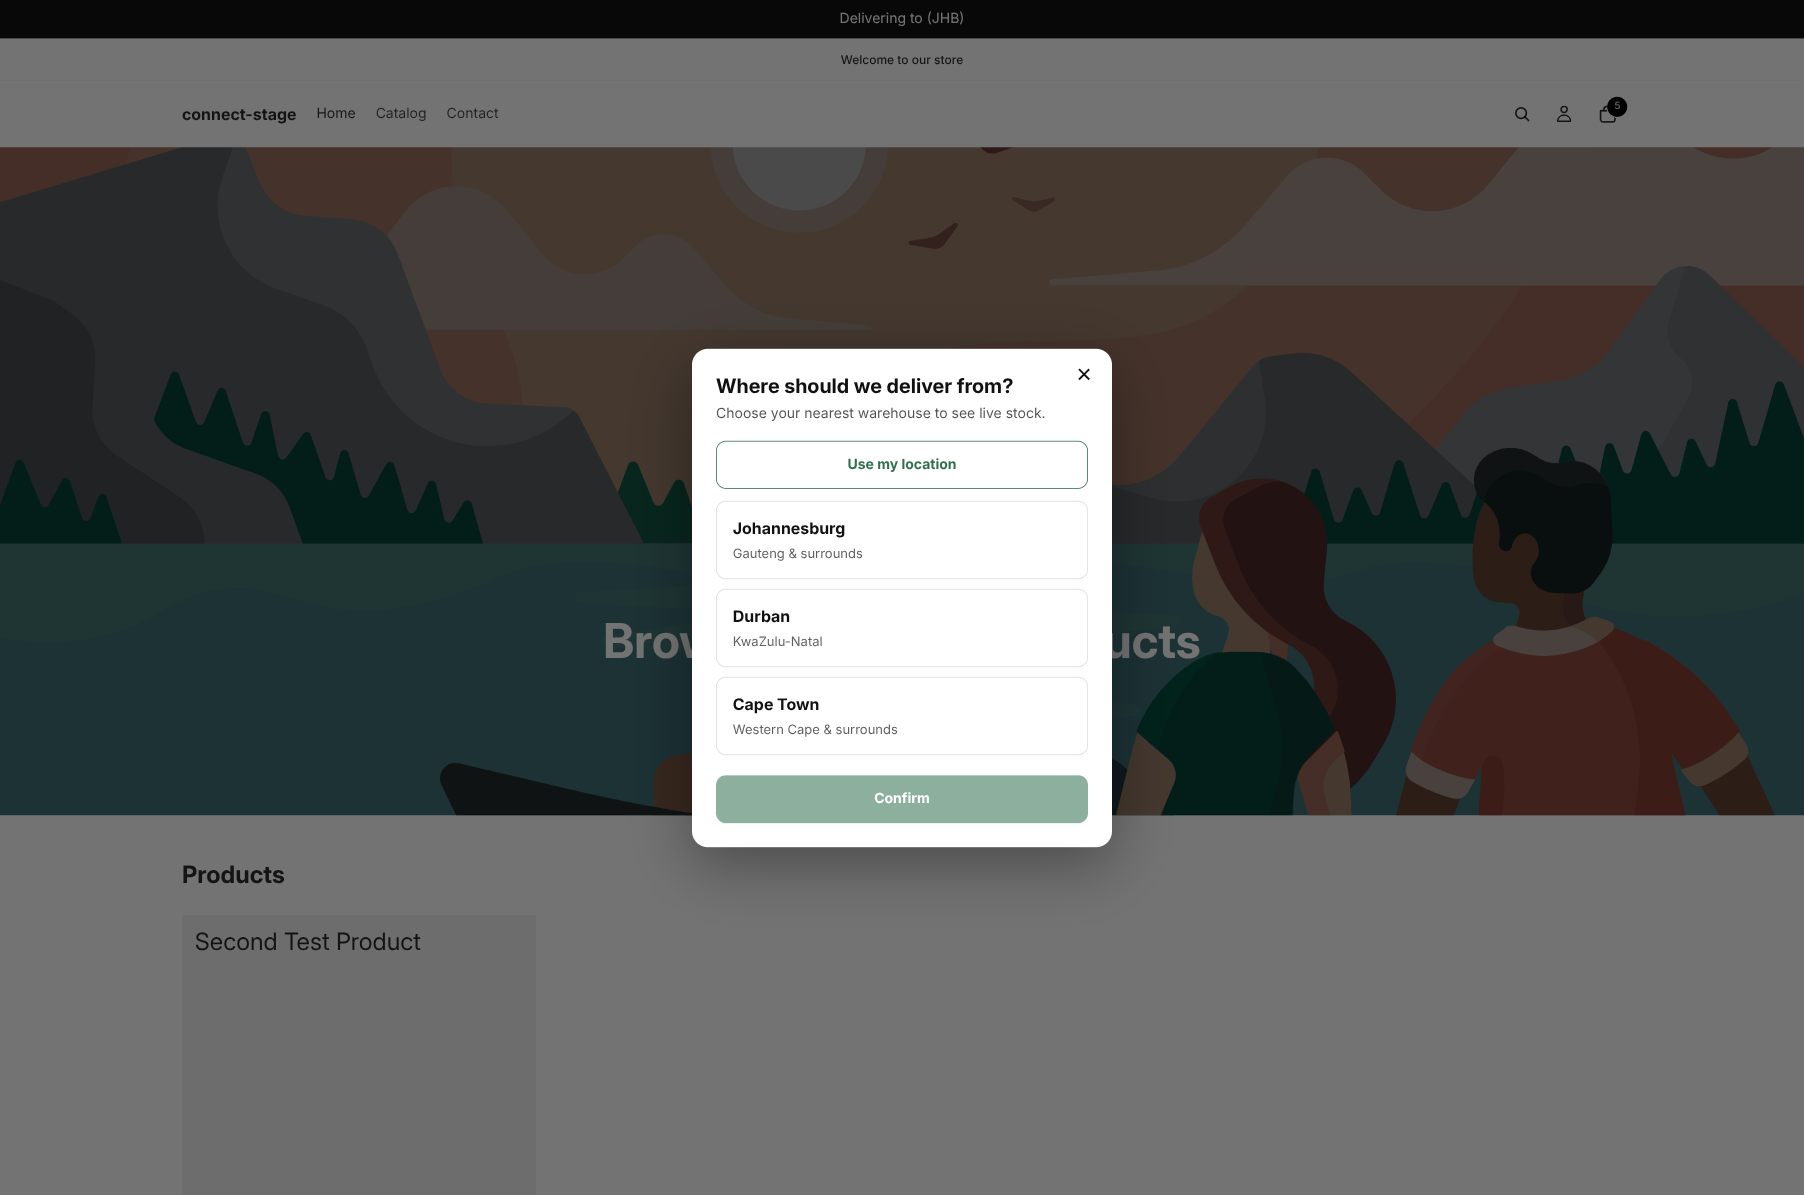
What the shopper sees
Section titled “What the shopper sees”- A “Where should we deliver from?” pop-up the first time they try to add something to the cart, with a “Use my location” option.
- A “Delivering from [warehouse] · Change” bar so they always know, and can switch, their delivery area.
- Out-of-stock items greyed out using your theme’s normal sold-out styling, so they can’t be added.
- A “We updated your cart” message if something in their cart isn’t fully available at their chosen warehouse — the app quietly adjusts the cart and tells them what changed.
Setting it up
Section titled “Setting it up”There are two one-time steps, both done inside your own Shopify admin. The Live inventory page in the app has buttons that take you straight to the right screens.
Step 1 — Turn on the two app embeds
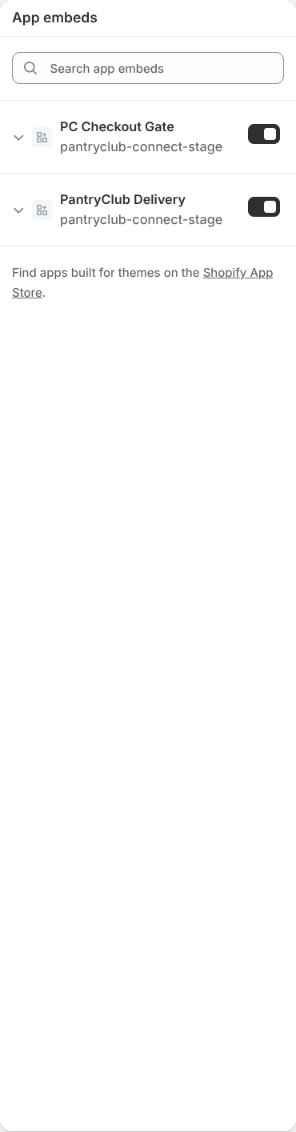
Section titled “Step 1 — Turn on the two app embeds”In your Shopify theme editor, open App embeds and switch on both:
- PantryClub Delivery — the warehouse picker, the “Delivering from” bar, and the live stock on your product pages.
- PC Checkout Gate — re-checks stock when the shopper clicks checkout, and carries their delivery postcode through to the order.
Step 2 — Turn on checkout validation
Section titled “Step 2 — Turn on checkout validation”In your Shopify admin, go to Settings → Checkout → Checkout rules and turn on the “PantryClub Postcode Validation” rule.
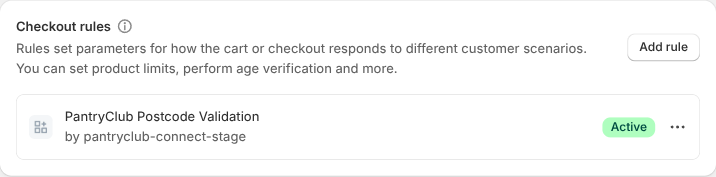
This is the safety net for the moment a shopper changes their address at checkout. It blocks checkout if the delivery address no longer matches the warehouse they were shopping from, so orders can’t be placed for an address that warehouse can’t serve. It works on all Shopify plans, including Basic.
Customising how it looks
Section titled “Customising how it looks”Under the PantryClub Delivery app embed in the theme editor, you can adjust things to match your store, including:
- the default warehouse shown to a first-time visitor,
- whether to show the “Delivering from” bar and where it sits,
- the wording of the sold-out label and the warehouse picker (heading, subtitle, per-warehouse labels and coverage notes, confirm button),
- colours (accent, button text, bar), corner radius, and overlay opacity.
These are all optional — the defaults work out of the box.